Bundle analysis
More often you need to understand how much space you can save using this library. The simplest way for performing this - compare files size. But it's a pretty routine task. So you can save a little bit time and get great bundle analytics using such tools as visualize-bundle and react-native-bundle-visualizer
Bundle analysis
Visualization of the bundle
Since react-native-bundle-visualizer has some issues with typescript I recommend you use visualize-bundle library.
First of all you need to install it:
yarn add visualize-bundle --dev
# or with npm
# npm install visualize-bundle --save-dev
After installation edit your package.json:
{
  "scripts": {
+      "bundle:analysis": "visualize-bundle"
  }
}
And then run analyzer:
- In one terminal:
react-native start
- In the second terminal
yarn run bundle:analysis
# or with npm
# npm run bundle:analysis
You will see something like this:
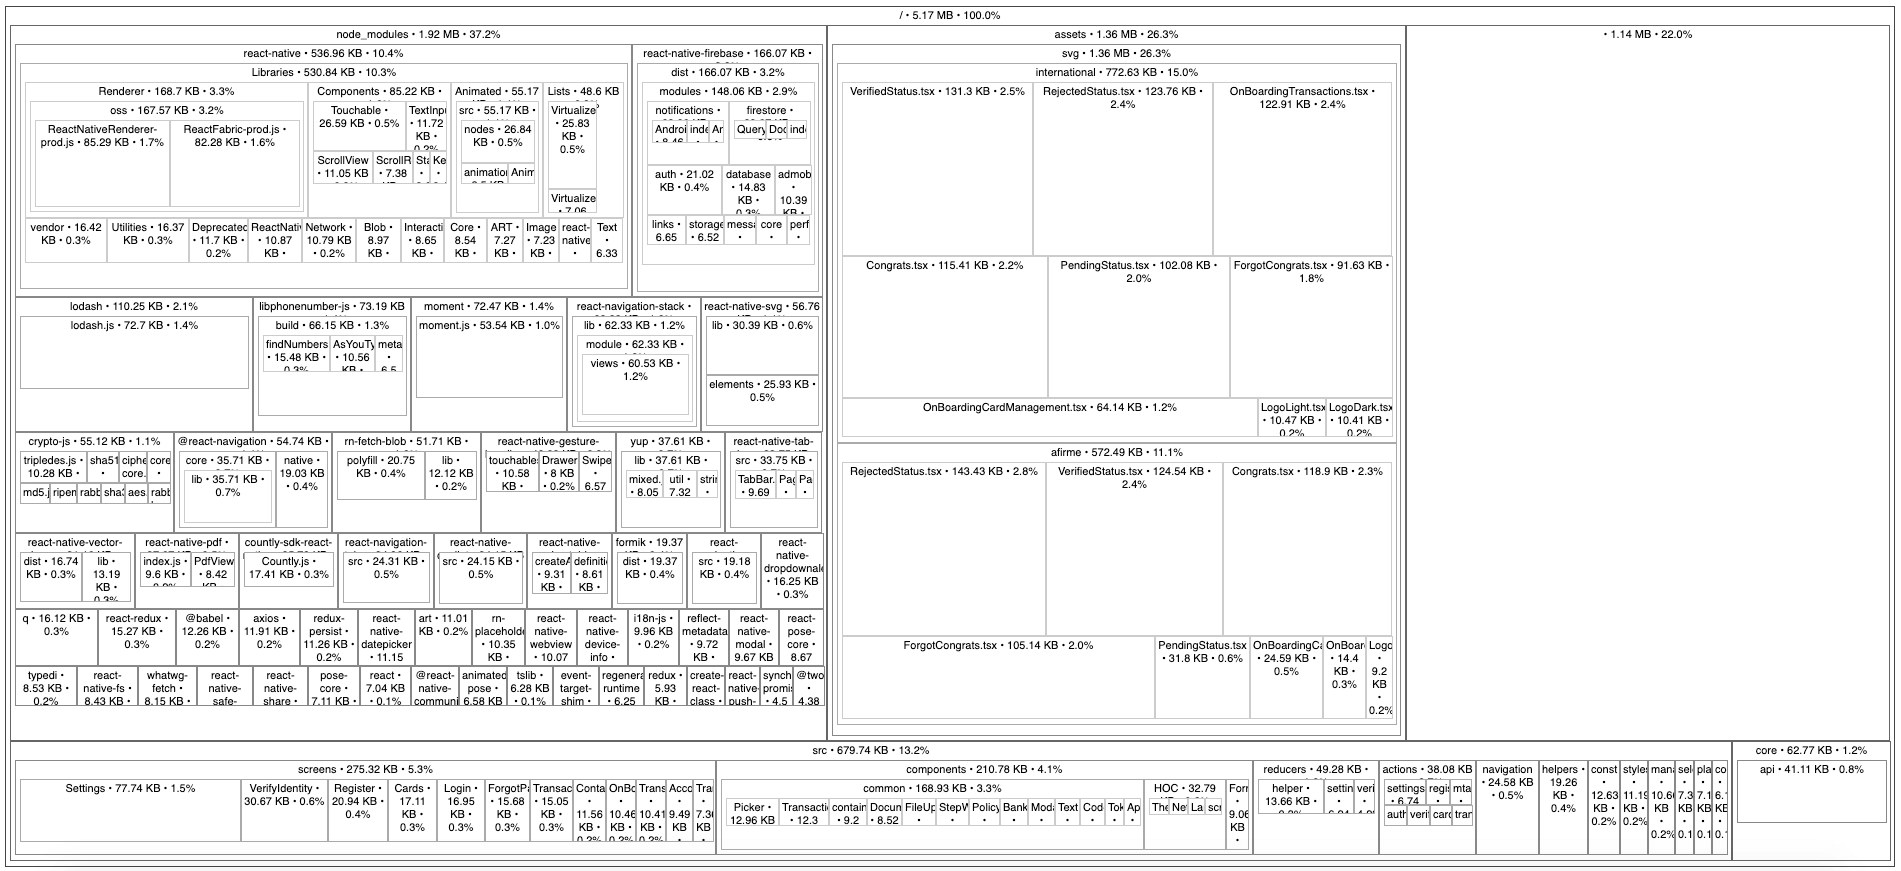
It looks terrible, but let's see a little bit deeply into this picture.
Analysis of the bundle
First of all you need to look at big rectangles, since they are the most significant. In this picture you can see, that in node_modules you have several libraries, with pretty big size, such as moment, lodash, react-native-firebase and others. On other hand we have pretty big assets folder and src (screens and components).
And here is few tactics for proper splitting the final bundle:
- As an alternative for
momentyou can select any other library that will fit for your goals and require less memory - For
lodashyou can use not absolute import and import each function as a separate (instead ofimport { isEqual } from 'lodash'you can writeimport isEqual from 'lodash/isEqual') - Firebase from
6.0.0version is not monorepo and for every feature (notification/crashlytics etc) you can use separate package - All yours code and assets you can wrap in HOC provided by
react-native-bundle-splitterand it should reduce the size of initial loaded bundle
It's common tactics that you may apply in order to simplify your entry point of an application.
Analysis of the content in packager folder
In this folder you should have modules.android.js and modules.ios.js files. If you open any of them and will try to search for /node_modules you may find a lot of matches.
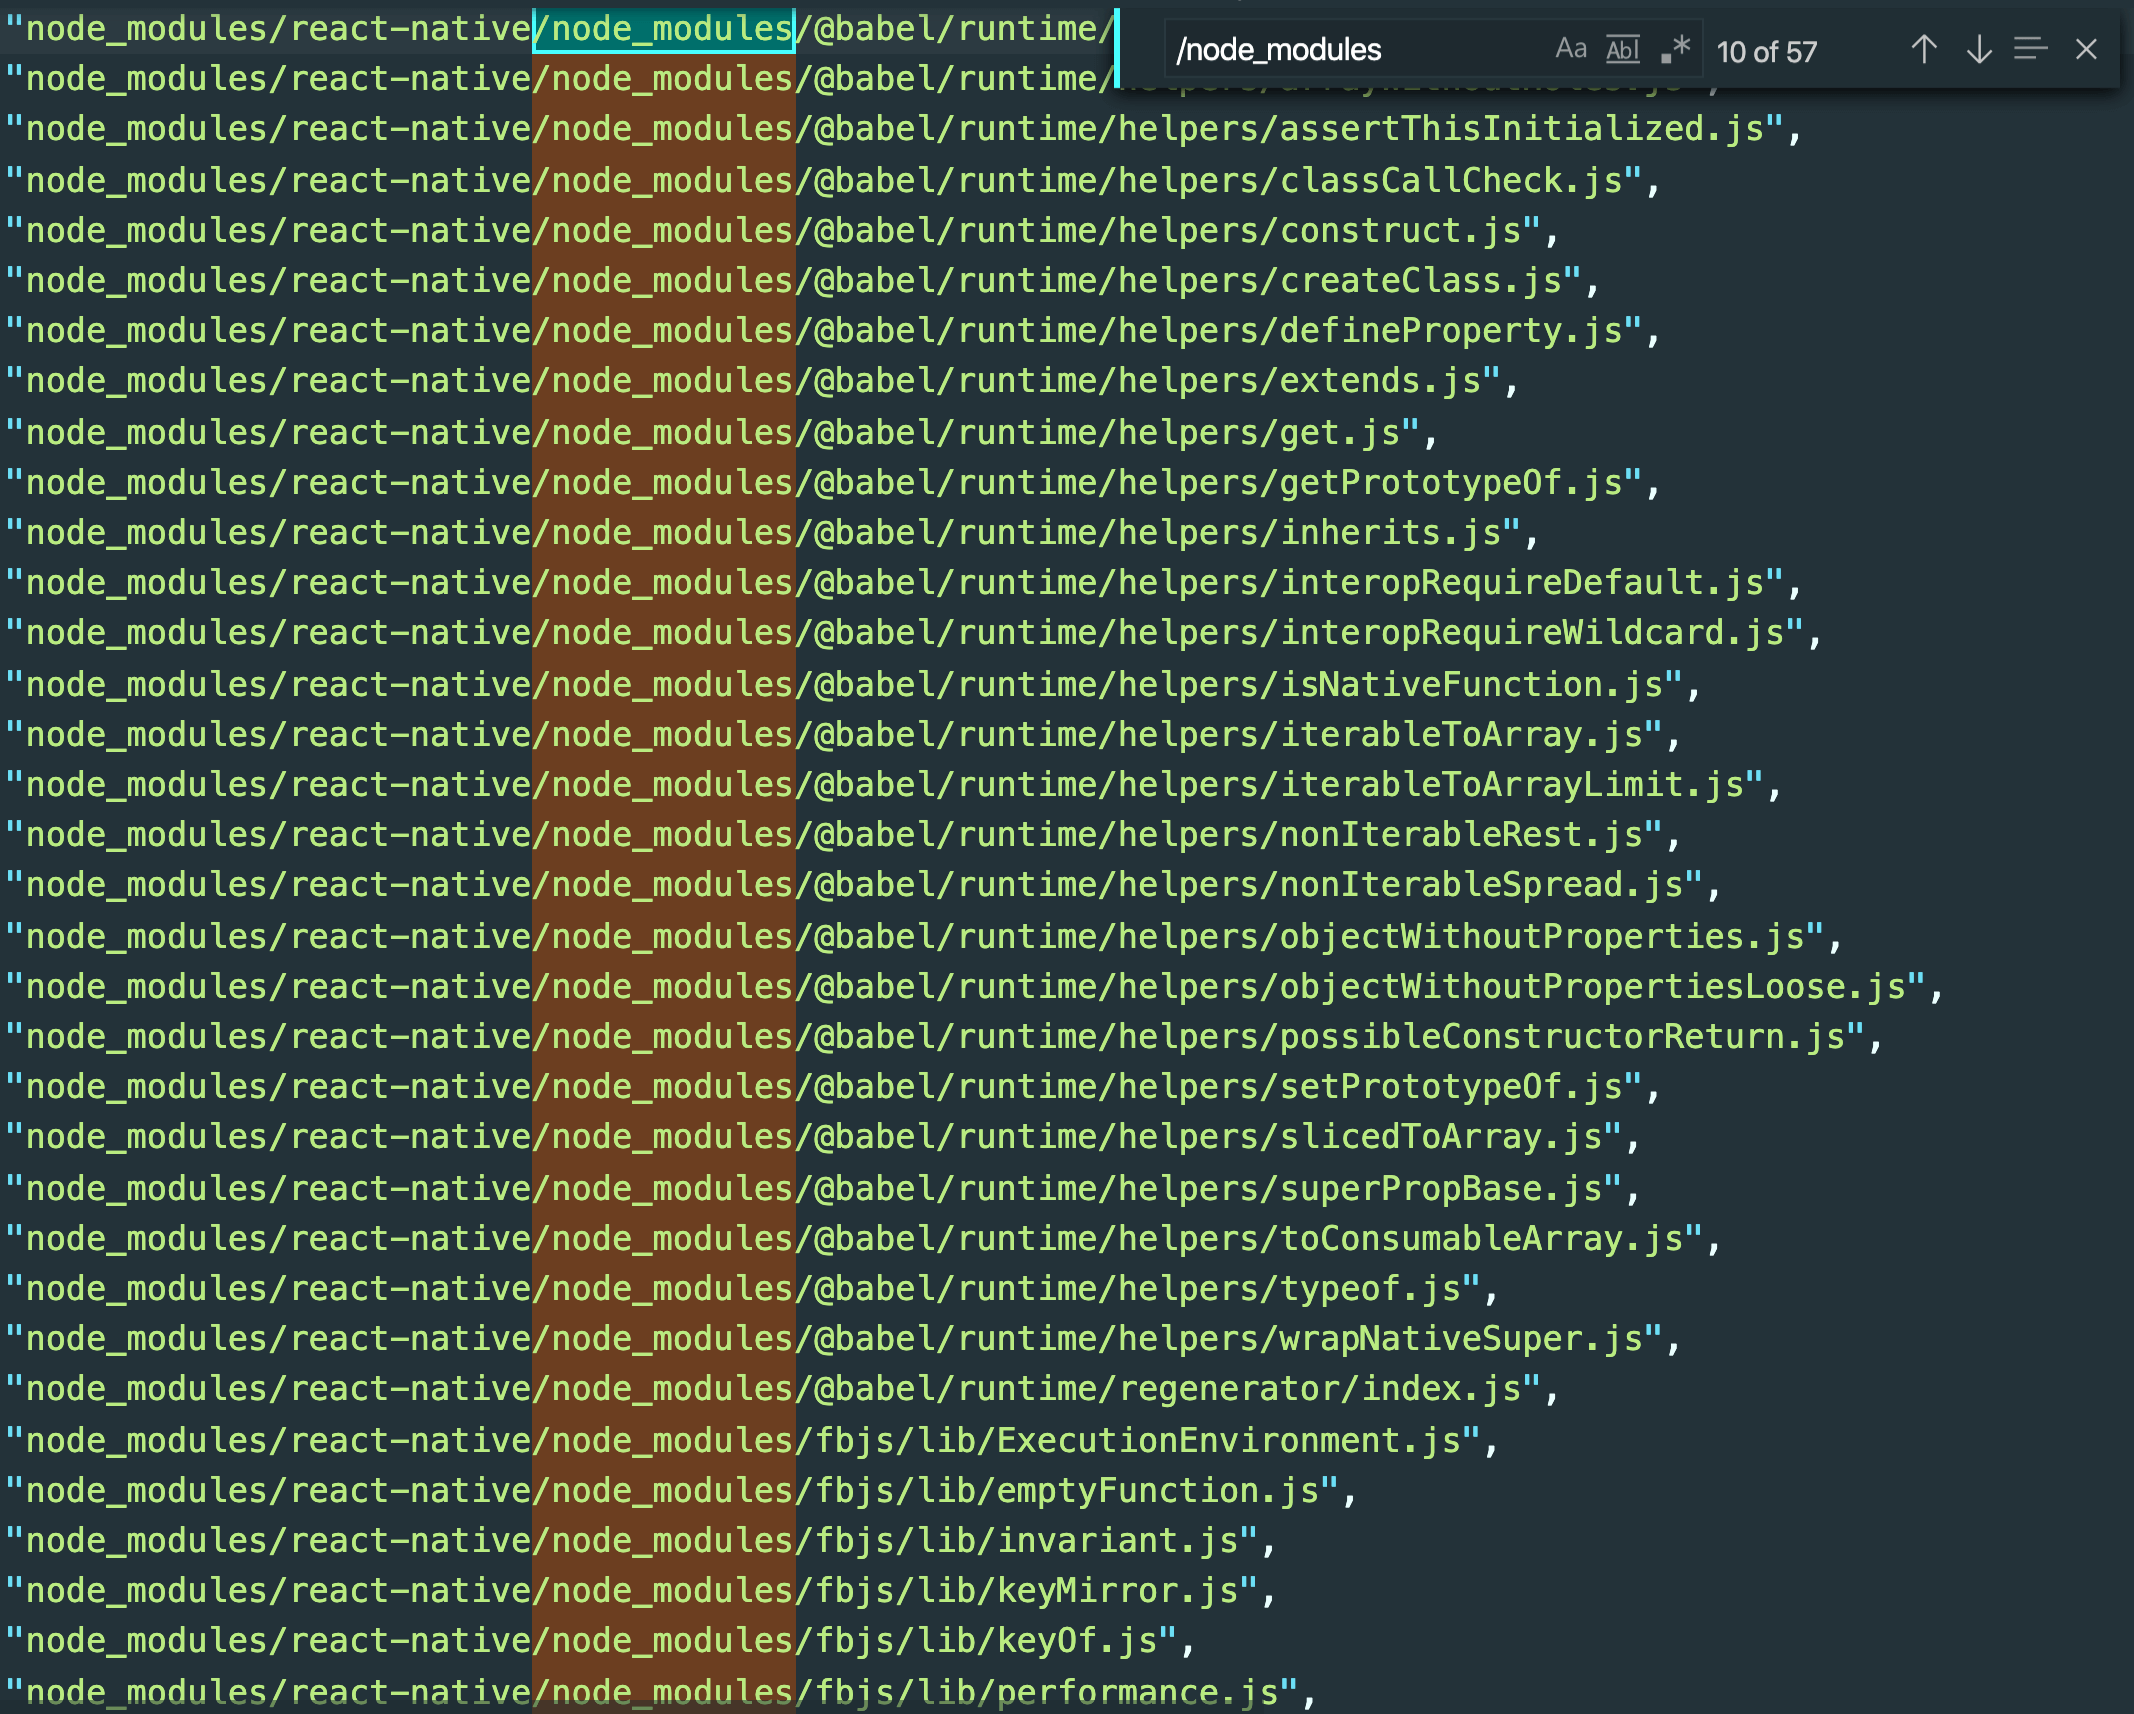
In the example above we see, that react-native uses different versions of @babel/runtime and fbjs. It often happens, when you have a large project with a lot of 3rd party dependencies. And all of these libraries use different versions of common libraries.
Because of this, tree dependency becomes complicated and bundle grows because of "duplication" of dependencies. But it can be easily fixed, if you dig into package-lock.json/yarn.lock file and manually re-organize dependency tree. For package-lock.json you may follow this instruction. And for yarn.lock you may use resolutions approach.
Thus, by explicitly specifying common dependencies for some packages, you can avoid "duplication" (when the same package is used many times but with different versions) and make your bundle smaller.
Summary
The main goal of this article is to demonstrate a way for determining the order and prioritizing thing where you should work. Via visualization of bundle you can understand, what exactly may slow down your startup of an application and understand possible way for resolving it.