Building Photos app transitions in React Native
In this guide we'll build the image transition from the Photos app in React Native, step by step: a thumbnail grows out of the grid to full screen, and the full-res photo replaces it the moment it loads, even mid-animation, with no flickers, no blank frames and no jumps.
This is what we're building:
How it works
Here is the whole transition, taken apart into the layers that make it work. Hover over (or tap) any layer or image to see what it does.
Animation transcript:
- The gallery: a
FlatListof low-res thumbnails. APortalHostnamed"root"waits above the navigator. - Every thumbnail is wrapped in a
<Portal>. Without a host name, it renders in place, inside theFlatList. - Tap teleports the thumbnail into the root
PortalHost.<Portal hostName="root">re-parents the same native view, in one frame. - The detail screen mounts the full-res photo, invisible. Its
<Image>sits atopacity: 0on the thumbnail’s path while it loads. - Both ride the same spring, but you only see the low-res one. One
progressvalue drives translate, scale and height on both layers. - When
onLoadfires mid-flight, one commit swaps them.set({ visibility: { source: 0, target: 1 } })hands the image over to the detail screen in the same native frame. - The full-res photo finishes the animation. The hidden thumbnail keeps pace until it ends.
- When the animation ends, the thumbnail teleports back to its cell. It stays hidden while the photo is open, and Close fades in.
- Close runs the same interpolation in reverse.
goBackspringsprogressback to0, and the full-res photo shrinks into the cell on the detail screen. - Then the thumbnail shows up and the detail screen closes.
visibilitygoes back to{ source: 1, target: 0 }, andnavigation.goBack()removes the screen. - What users see: one continuous image, sharp as soon as it’s ready. No flicker, no blank frames, no second decode of the full-res photo.
Three layers take part in the transition:
- Gallery screen. A
FlatListof low-res thumbnails. Each thumbnail is wrapped in a<Portal>. - Detail screen. Pushed as a transparent modal, without a native animation. It renders the full-res
<Image>, hidden at first. - Root
PortalHost. Rendered by<PortalProvider>above the navigator, so anything teleported into it is drawn on top of every screen.
The thumbnail starts the animation, because it's already on screen. The full-res photo finishes it, because it's the one worth looking at. The trick is to hand over from one to the other without the user noticing.
Prerequisites
This guide assumes you have a React Native project with the following libraries installed:
react-native-teleport— the star of the show@react-navigation/native-stack— for navigation (but you can use any navigation library)react-native-reanimated— for smooth animationsreact-native-safe-area-context— for safe area insetszustand— for lightweight state management
Step 1: Build the grid
Let's start with a plain photo grid: no viewer, no animations, nothing teleported.
The grid has three columns. SCALE is how many times the full-width photo is wider than a thumbnail; we'll need it for the animation:
import { Dimensions } from "react-native";

export const SCREEN_WIDTH = Math.min(Dimensions.get("window").width, 540);
export const COLUMNS = 3;
export const THUMB_SIZE = SCREEN_WIDTH / COLUMNS;
export const SCALE = SCREEN_WIDTH / THUMB_SIZE;
Each photo comes in two sizes: a small thumbnail for the grid and the full-size photo for the viewer. The thumbnail keeps the same aspect ratio as the full image: when both are cropped with resizeMode="cover" into the same rectangle, they show exactly the same part of the photo, so the swap at the end of this guide doesn't shift the content.
export type Photo = {
  id: string;
  thumbnail: string;
  fullSize: string;
  width: number;
  height: number;
};

const PHOTO_DATA: { id: number; width: number; height: number }[] = [
  { id: 10, width: 1080, height: 720 },
  { id: 15, width: 720, height: 1080 },
  { id: 20, width: 1080, height: 720 },
  { id: 25, width: 1080, height: 1080 },
  { id: 29, width: 1080, height: 720 },
  { id: 36, width: 720, height: 1080 },
  { id: 42, width: 1080, height: 720 },
  { id: 49, width: 1080, height: 720 },
  { id: 54, width: 720, height: 1080 },
  { id: 58, width: 1080, height: 720 },
  { id: 75, width: 1080, height: 720 },
  { id: 76, width: 720, height: 1080 },
];

const THUMB_SHORT_SIDE = 150;

const PHOTOS: Photo[] = PHOTO_DATA.map(({ id, width, height }) => {
  // Match the thumbnail's aspect to the full image so picsum returns the same
  // crop window — otherwise the cover-cropped thumb and the full image show
  // different parts of the original, producing a content jump at handoff.
  const thumbW =
    width >= height
      ? Math.round(THUMB_SHORT_SIDE * (width / height))
      : THUMB_SHORT_SIDE;
  const thumbH =
    height > width
      ? Math.round(THUMB_SHORT_SIDE * (height / width))
      : THUMB_SHORT_SIDE;

  return {
    id: String(id),
    thumbnail: `https://picsum.photos/id/${id}/${thumbW}/${thumbH}`,
    fullSize: `https://picsum.photos/id/${id}/${width}/${height}`,
    width,
    height,
  };
});

export default PHOTOS;
An image's memory use depends on its dimensions, not its file size. Compression only shrinks the download: to draw a JPEG, iOS and Android decode it into 4 bytes per pixel (red, green, blue and an alpha or padding byte; see Apple's WWDC talk on memory and Android's ARGB_8888). Take the square photo from this guide:
| Pixels | File (JPEG) | In memory | |
|---|---|---|---|
| Thumbnail | 150 × 150 | 8 KB | 90 KB |
| Full-res | 1080 × 1080 | 225 KB | 4.7 MB |
The full-res photo needs about 50 times more memory than its thumbnail. A grid of thumbnails stays fast and light no matter how long the list gets.
A thumbnail is an image in a fixed-size View. That fixed size will matter later: when the image leaves its cell, the cell keeps its place.
import React from "react";
import { Image, View } from "react-native";

import type { Photo } from "./photos";
import { THUMB_SIZE } from "./constants";

type Props = {
  photo: Photo;
};

function PhotoPreview({ photo }: Props) {
  return (
    <View
      style={{
        height: THUMB_SIZE,
        width: THUMB_SIZE,
      }}
    >
      <Image
        style={{ width: THUMB_SIZE, height: THUMB_SIZE }}
        source={{ uri: photo.thumbnail }}
        resizeMode="cover"
      />
    </View>
  );
}

export default React.memo(PhotoPreview);
The gallery is a regular FlatList:
import { FlatList, StyleSheet, View } from "react-native";

import PHOTOS from "./photos";
import PhotoPreview from "./PhotoPreview";

function PhotoGallery() {
  return (
    <View style={styles.container}>
      <FlatList
        data={PHOTOS}
        keyExtractor={(item) => item.id}
        numColumns={3}
        renderItem={({ item }) => <PhotoPreview photo={item} />}
      />
    </View>
  );
}

const styles = StyleSheet.create({
  container: {
    flex: 1,
    backgroundColor: "#000",
  },
});

export default PhotoGallery;
It lives in a native stack, so it gets a header titled "Photos":
import { createNativeStackNavigator } from "@react-navigation/native-stack";

import PhotoGallery from "./PhotoGallery";

export type RootStackParamList = {
  PhotoGallery: undefined;
};

const Stack = createNativeStackNavigator<RootStackParamList>();

export default function RootStack() {
  return (
    <Stack.Navigator>
      <Stack.Screen
        name="PhotoGallery"
        component={PhotoGallery}
        options={{ title: "Photos" }}
      />
    </Stack.Navigator>
  );
}
import { NavigationContainer } from "@react-navigation/native";
import { SafeAreaProvider } from "react-native-safe-area-context";

import RootStack from "./navigation";

export default function App() {
  return (
    <SafeAreaProvider>
      <NavigationContainer>
        <RootStack />
      </NavigationContainer>
    </SafeAreaProvider>
  );
}
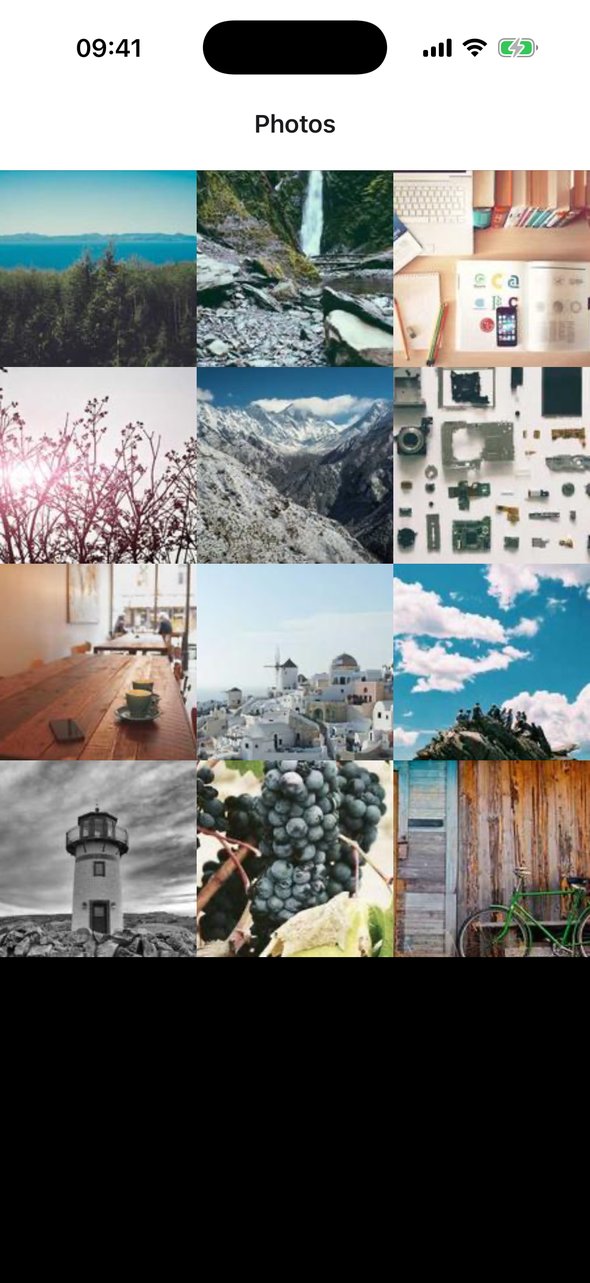
Run the app, and you get a grid of photos:
Step 2: Open a full-screen viewer
Now make the photos tappable. A tap opens a detail screen with the full-res photo and a Close button.
From here on, when a step changes a file, the changed lines are highlighted and // ... marks code that stays as it was. The complete code is linked at the end of the guide.
The detail screen is a transparent modal without a native animation. We'll draw the transition ourselves later, and the gallery has to stay visible underneath while the photo is still growing:
import { createNativeStackNavigator } from "@react-navigation/native-stack";

import PhotoDetail from "./PhotoDetail";
import PhotoGallery from "./PhotoGallery";
import type { Photo } from "./photos";

export type RootStackParamList = {
  PhotoGallery: undefined;
  PhotoDetail: { photo: Photo };
};

const Stack = createNativeStackNavigator<RootStackParamList>();

export default function RootStack() {
  return (
    <Stack.Navigator>
      <Stack.Screen
        name="PhotoGallery"
        component={PhotoGallery}
        options={{ title: "Photos" }}
      />
      <Stack.Screen
        name="PhotoDetail"
        component={PhotoDetail}
        options={{
          headerShown: false,
          animation: "none",
          presentation: "containedTransparentModal",
        }}
      />
    </Stack.Navigator>
  );
}
A regular screen push hides the previous screen. A transparent modal keeps the gallery rendered and visible behind the detail screen, so during the transition you see the photo grow over the grid, not over an empty background. It also leaves room for a swipe-down-to-dismiss gesture later, where the user needs to see the grid underneath while dragging.
The detail screen draws a black backdrop, the full-res photo at full width and a Close button:
import { Image, Pressable, StyleSheet, Text, View } from "react-native";
import { useSafeAreaInsets } from "react-native-safe-area-context";
import { useNavigation } from "@react-navigation/native";
import type { StaticScreenProps } from "@react-navigation/native";

import type { Photo } from "./photos";
import { SCREEN_WIDTH } from "./constants";

type PhotoDetailProps = StaticScreenProps<{ photo: Photo }>;

function PhotoDetail({ route }: PhotoDetailProps) {
  const { photo } = route.params;
  const navigation = useNavigation();
  const { top: safeAreaTop } = useSafeAreaInsets();

  const fullHeight = SCREEN_WIDTH * (photo.height / photo.width);

  return (
    <View style={styles.container}>
      <View style={styles.backdrop} />
      <Image
        source={{ uri: photo.fullSize }}
        style={{
          marginTop: safeAreaTop,
          width: SCREEN_WIDTH,
          height: fullHeight,
        }}
        resizeMode="cover"
        fadeDuration={0}
      />
      <Pressable
        style={[styles.backButton, { top: safeAreaTop + 10 }]}
        onPress={navigation.goBack}
      >
        <Text style={styles.backText}>Close</Text>
      </Pressable>
    </View>
  );
}

const styles = StyleSheet.create({
  backdrop: {
    ...StyleSheet.absoluteFillObject,
    backgroundColor: "#000",
  },
  container: {
    flex: 1,
  },
  backButton: {
    position: "absolute",
    left: 16,
    backgroundColor: "rgba(255,255,255,0.2)",
    paddingHorizontal: 14,
    paddingVertical: 8,
    borderRadius: 20,
  },
  backText: {
    color: "#fff",
    fontSize: 16,
    fontWeight: "600",
  },
});

export default PhotoDetail;
Each thumbnail reports the tap:
import React from "react";
import { Image, TouchableWithoutFeedback, View } from "react-native";

import type { Photo } from "./photos";
import { THUMB_SIZE } from "./constants";

type Props = {
  photo: Photo;
  onOpen: (photo: Photo) => void;
};

function PhotoPreview({ photo, onOpen }: Props) {
  return (
    <TouchableWithoutFeedback onPress={() => onOpen(photo)}>
      {/* the View with the Image from step 1 */}
    </TouchableWithoutFeedback>
  );
}

// ...
And the gallery opens the detail screen:
import { FlatList, StyleSheet, View } from "react-native";
import { useNavigation } from "@react-navigation/native";
import type { NativeStackNavigationProp } from "@react-navigation/native-stack";

import PHOTOS, { type Photo } from "./photos";
import PhotoPreview from "./PhotoPreview";
import type { RootStackParamList } from "./navigation";

function PhotoGallery() {
  const navigation =
    useNavigation<NativeStackNavigationProp<RootStackParamList>>();

  const onPhotoOpen = (photo: Photo) => {
    navigation.navigate("PhotoDetail", { photo });
  };

  return (
    <View style={styles.container}>
      <FlatList
        data={PHOTOS}
        keyExtractor={(item) => item.id}
        numColumns={3}
        renderItem={({ item }) => (
          <PhotoPreview photo={item} onOpen={onPhotoOpen} />
        )}
      />
    </View>
  );
}

// ...
It works, but it doesn't feel like a photo app yet. Watch the moment right after each tap:
The detail screen pops in, stays black for a moment, and only then does the photo appear. Nothing connects the photo to the thumbnail you tapped.
The full-res photo isn't in memory yet. The tap starts the download, then the image has to be decoded, and only after that can it be drawn. In the recording above it takes about 150 ms on a fast connection; on a cellular network it can take seconds. Meanwhile, the thumbnail you just tapped is already decoded and on screen.
Image.prefetch(url) downloads an image into the cache ahead of time. That's fine for a handful of images, but galleries, chats and feeds have thousands. Prefetching every full-res photo downloads megabytes that most users never look at, and keeping them decoded in memory for an instant display is how apps get killed with out-of-memory errors: a single 12-megapixel photo takes about 48 MB once decoded (4032 × 3024 × 4 bytes). And even a cached photo still has to be decoded before it shows up, so prefetching shortens the black screen, but doesn't remove it.
So instead of waiting for the full-res photo, we'll start the animation with what's already on screen: the thumbnail.
Step 3: Add the teleport infrastructure
Three pieces make the transition possible. None of them changes what you see yet.
The root PortalHost
<PortalProvider> renders a PortalHost named "root" above its children. Wrap the navigator with it:
import { NavigationContainer } from "@react-navigation/native";
import { SafeAreaProvider } from "react-native-safe-area-context";
import { PortalProvider } from "react-native-teleport";

import RootStack from "./navigation";

export default function App() {
  return (
    <SafeAreaProvider>
      <PortalProvider>
        <NavigationContainer>
          <RootStack />
        </NavigationContainer>
      </PortalProvider>
    </SafeAreaProvider>
  );
}
Anything teleported into the root host is drawn above every screen: the gallery, the detail screen, the native header and a tab bar if you have one. That's exactly where a flying photo belongs. Inside the list it would be clipped by the FlatList and drawn under the header.
The transition store
A small Zustand store coordinates both screens. For now it only knows which photo is moving (id) and where its thumbnail was on screen (position). We'll grow it with every step:
import { create } from "zustand";

type Position = {
  x: number;
  y: number;
};

interface HeroStore {
  /** Which photo is currently animating (Portal teleport) */
  id: string;
  /** Measured position of the thumbnail before transition */
  position: Position | undefined;
  set: (newState: Partial<Omit<HeroStore, "set">>) => void;
  goBack: (callback: () => void) => void;
  goForward: (id: string, x: number, y: number, callback: () => void) => void;
}

export const useHeroTransition = create<HeroStore>((set) => ({
  id: "",
  position: undefined,
  set: (newState) => set((state) => ({ ...state, ...newState })),

  goBack: (callback: () => void) => {
    set({
      id: "",
      position: undefined,
    });
    callback();
  },
  goForward: (id: string, x: number, y: number, callback: () => void) => {
    set({
      position: { x, y },
      id,
    });
    callback();
  },
}));
Components subscribe only to the slices they need. Each thumbnail selects s.id === photo.id, so a transition re-renders the tapped thumbnail and the detail screen, not the whole grid.
Measuring the thumbnail
The animation starts from the thumbnail's position in the window:
import { Platform, type View } from "react-native";
import { useSafeAreaInsets } from "react-native-safe-area-context";

type MeasureCallback = (x: number, y: number) => void;

const useMeasure = (viewRef: React.RefObject<View | null>) => {
  const insets = useSafeAreaInsets();

  return (callback: MeasureCallback) => {
    // @ts-expect-error
    viewRef.current?.measureInWindow((x: number, y: number) => {
      // it looks like enabled edge-to-edge (Android 16+) produces incorrect
      // measurement offset
      if (Platform.OS === "android") {
        return callback(x, y + insets.top);
      }

      return callback(x, y);
    });
  };
};

export default useMeasure;
Step 4: Teleport the thumbnail into the root host
Here comes the core trick. When the user taps a thumbnail, we measure it, store its position and switch its <Portal> to the root host:
import React, { useCallback, useRef } from "react";
import { Image, TouchableWithoutFeedback, View } from "react-native";
import { Portal } from "react-native-teleport";

import type { Photo } from "./photos";
import { THUMB_SIZE } from "./constants";
import { useHeroTransition } from "./hero";
import useMeasure from "./useMeasure";

// ...

function PhotoPreview({ photo, onOpen }: Props) {
  const ref = useRef<View>(null);
  const measure = useMeasure(ref);
  const isAnimating = useHeroTransition((s) => s.id === photo.id);
  const position = useHeroTransition((s) =>
    s.id === photo.id ? s.position : undefined,
  );
  const goForward = useHeroTransition((s) => s.goForward);

  const onPress = useCallback(() => {
    if (useHeroTransition.getState().id !== "") return;

    measure((x, y) => {
      goForward(photo.id, x, y, () => onOpen(photo));
    });
  }, [photo, goForward, onOpen, measure]);

  return (
    <TouchableWithoutFeedback onPress={onPress}>
      <View
        // @ts-expect-error ref type mismatch between View component and host instance
        ref={ref}
        style={{
          height: THUMB_SIZE,
          width: THUMB_SIZE,
        }}
      >
        <Portal hostName={position && isAnimating ? "root" : undefined}>
          <View
            style={
              isAnimating
                ? {
                    top: position?.y,
                    left: position?.x,
                  }
                : undefined
            }
          >
            {/* the Image from step 1 */}
          </View>
        </Portal>
      </View>
    </TouchableWithoutFeedback>
  );
}

// ...
From the user's point of view, nothing has moved yet: the thumbnail is positioned at exactly the coordinates it had in the grid. But it isn't in the grid anymore. The same native view now lives in the root host, above every screen.
The Close button now goes through the store, which clears id and sends the thumbnail back into its cell:
import { useCallback } from "react";
// ...
import { useHeroTransition } from "./hero";

type PhotoDetailProps = StaticScreenProps<{ photo: Photo }>;

function PhotoDetail({ route }: PhotoDetailProps) {
  const { photo } = route.params;
  const goBack = useHeroTransition((s) => s.goBack);
  // ...

  const onGoBack = useCallback(() => {
    goBack(navigation.goBack);
  }, [navigation, goBack]);

  return (
    <View style={styles.container}>
      {/* ... */}
      <Pressable
        style={[styles.backButton, { top: safeAreaTop + 10 }]}
        onPress={onGoBack}
      >
        <Text style={styles.backText}>Close</Text>
      </Pressable>
    </View>
  );
}

// ...
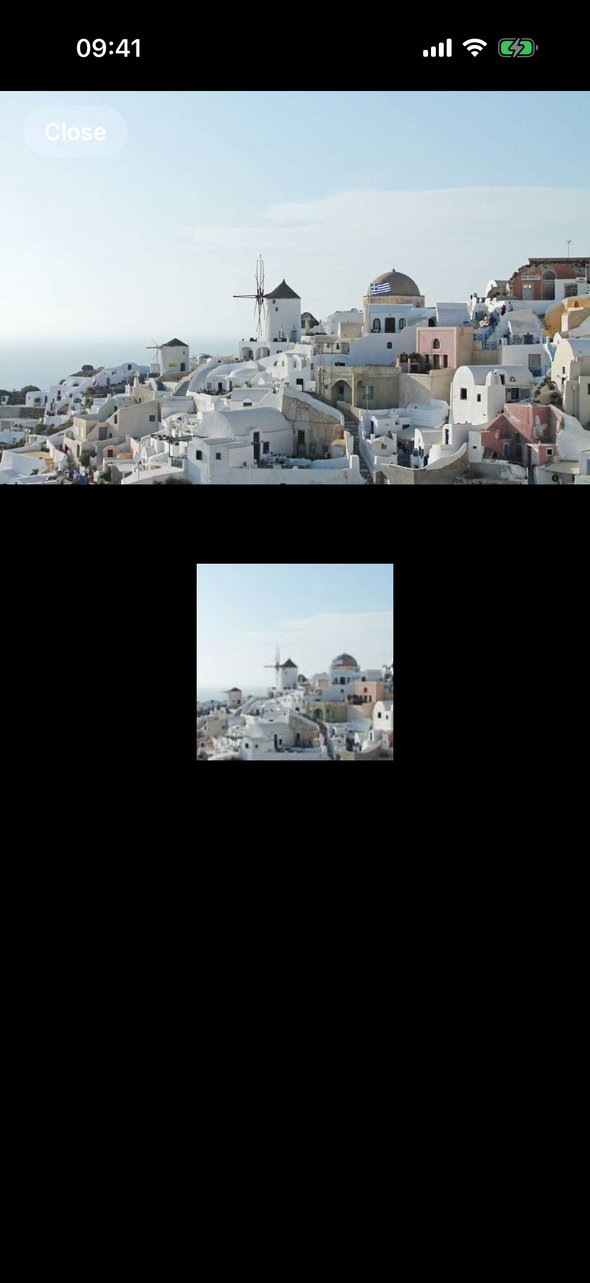
Run it and tap a photo. The detail screen opens as before, but the thumbnail you tapped is still visible on top of it, right where it was:
Animation transcript:
- Every thumbnail is wrapped in a
<Portal>. Without a host name, it renders in place, inside theFlatList. - Tap teleports the thumbnail into the root
PortalHost.<Portal hostName="root">re-parents the same native view, in one frame. - The detail screen opens below the thumbnail. The root host sits above every screen, so the thumbnail stays on top of the detail screen.
- What users see: the thumbnail on top of the detail screen. It keeps its grid position until the next step animates it.
It looks like a bug, but it's the foundation of the whole transition: the root host sits above every screen, so the thumbnail can now travel over the detail screen. The next step makes it travel.
The thumbnail isn't re-created in the root host. <Portal> re-parents the existing native view, so the image isn't re-downloaded or re-decoded, and a video or GIF in its place would keep playing. Its wrapper View stays behind and keeps the cell's size, so the list doesn't reflow.
Step 5: Animate it to full screen
Time to make it fly. Add a spring config:
// ...
export const SCALE = SCREEN_WIDTH / THUMB_SIZE;
export const SPRING_CONFIG = {
  mass: 1.2,
  damping: 1000,
  stiffness: 500,
  overshootClamping: false,
};
The store gets a progress shared value that goes from 0 (thumbnail in its cell) to 1 (photo at full screen), a direction, and visibility for the two images. goForward updates the store first, which teleports the thumbnail, and starts the spring and the navigation in the next frame:
import {
  type SharedValue,
  makeMutable,
  runOnJS,
  withSpring,
} from "react-native-reanimated";
import { create } from "zustand";
import { SPRING_CONFIG } from "./constants";

type Position = {
  x: number;
  y: number;
};

interface HeroStore {
  direction: "forward" | "backward" | "neutral";
  /** Which photo is currently animating (Portal teleport) */
  id: string;
  /** Animation progress [0..1] */
  progress: SharedValue<number>;
  /** Measured position of the thumbnail before transition */
  position: Position | undefined;
  visibility: {
    /** Opacity of the source (thumbnail in grid) */
    source: number;
    /** Opacity of the target (full-res image on detail screen) */
    target: number;
  };
  set: (newState: Partial<Omit<HeroStore, "set">>) => void;
  isAnimationCompleted: boolean;
  transitionCompleted: () => void;
  goBack: (callback: () => void) => void;
  goForward: (id: string, x: number, y: number, callback: () => void) => void;
}

export const useHeroTransition = create<HeroStore>((set, get) => ({
  direction: "neutral",
  id: "",
  position: undefined,
  visibility: { source: 1, target: 0 },
  progress: makeMutable(0),
  isAnimationCompleted: false,
  set: (newState) => set((state) => ({ ...state, ...newState })),

  transitionCompleted: () => {
    set({ isAnimationCompleted: true });
  },

  goBack: (callback: () => void) => {
    get().progress.set(0);
    set({
      direction: "neutral",
      id: "",
      position: undefined,
      visibility: { source: 1, target: 0 },
      isAnimationCompleted: false,
    });
    callback();
  },
  goForward: (id: string, x: number, y: number, callback: () => void) => {
    set({
      direction: "forward",
      position: { x, y },
      visibility: { source: 1, target: 0 },
      isAnimationCompleted: false,
      id,
    });

    const transitionCompleted = get().transitionCompleted;
    requestAnimationFrame(() => {
      get().progress.set(
        withSpring(1, SPRING_CONFIG, () => {
          runOnJS(transitionCompleted)();
        }),
      );
      callback();
    });
  },
}));
The thumbnail turns every progress value into a position, a scale and a height:
import React, { useCallback, useRef } from "react";
import { StyleSheet, TouchableWithoutFeedback, View } from "react-native";
import Animated, {
  interpolate,
  useAnimatedStyle,
} from "react-native-reanimated";
import { Portal } from "react-native-teleport";
import { useSafeAreaInsets } from "react-native-safe-area-context";

import type { Photo } from "./photos";
import { SCALE, SCREEN_WIDTH, THUMB_SIZE } from "./constants";
import { useHeroTransition } from "./hero";
import useMeasure from "./useMeasure";

// ...

function PhotoPreview({ photo, onOpen }: Props) {
  // ...
  const progress = useHeroTransition((s) => s.progress);
  const goForward = useHeroTransition((s) => s.goForward);
  const { top: safeAreaTop } = useSafeAreaInsets();

  // Height the full image takes at thumbnail scale
  const fullImageHeight = SCREEN_WIDTH * (photo.height / photo.width);
  const diff = fullImageHeight / SCALE - THUMB_SIZE;

  const animatedHeight = useAnimatedStyle(
    () => ({
      height: isAnimating
        ? interpolate(progress.value, [0, 1], [THUMB_SIZE, THUMB_SIZE + diff])
        : THUMB_SIZE,
    }),
    [isAnimating, diff],
  );

  const transform = useAnimatedStyle(() => {
    return {
      transform: [
        {
          translateX: interpolate(
            progress.value,
            [0, 1],
            [0, -(position?.x ?? 0)],
          ),
        },
        {
          translateY: interpolate(
            progress.value,
            [0, 1],
            [0, safeAreaTop - (position?.y ?? 0)],
          ),
        },
        {
          scale: interpolate(progress.value, [0, 1], [1, SCALE]),
        },
      ],
    };
  }, [position, safeAreaTop]);

  // ...

  return (
    <TouchableWithoutFeedback onPress={onPress}>
      <View
        // @ts-expect-error ref type mismatch between View component and host instance
        ref={ref}
        style={{
          height: THUMB_SIZE,
          width: THUMB_SIZE,
        }}
      >
        <Portal hostName={position && isAnimating ? "root" : undefined}>
          <Animated.View
            style={
              isAnimating
                ? [
                    styles.animating,
                    {
                      top: position?.y,
                      left: position?.x,
                    },
                    transform,
                  ]
                : undefined
            }
          >
            <Animated.Image
              style={[{ width: THUMB_SIZE }, animatedHeight]}
              source={{ uri: photo.thumbnail }}
              resizeMode="cover"
            />
          </Animated.View>
        </Portal>
      </View>
    </TouchableWithoutFeedback>
  );
}

const styles = StyleSheet.create({
  animating: {
    transformOrigin: "0% 0%",
  },
});

// ...
The math is simpler than it looks. The thumbnail is square, the photo usually isn't. So we animate the height in thumbnail units, from THUMB_SIZE to fullImageHeight / SCALE, and scale the whole view by SCALE, using the top-left corner as the origin. At progress 1, the thumbnail covers exactly the rectangle where the full-res photo will be drawn.
The detail screen fades its backdrop in with progress, and keeps the full-res photo hidden for now (visibility.target is 0):
import { useCallback } from "react";
import { Image, Pressable, StyleSheet, Text, View } from "react-native";
import Animated, { useAnimatedStyle } from "react-native-reanimated";
// ...

function PhotoDetail({ route }: PhotoDetailProps) {
  const { photo } = route.params;
  const { visibility } = useHeroTransition();
  const progress = useHeroTransition((s) => s.progress);
  const direction = useHeroTransition((s) => s.direction);
  // ...

  const backdrop = useAnimatedStyle(
    () => ({
      opacity: direction === "neutral" ? 1 : progress.value,
    }),
    [direction],
  );

  return (
    <View style={styles.container}>
      <Animated.View style={[styles.backdrop, backdrop]} />
      <Image
        source={{ uri: photo.fullSize }}
        style={{
          marginTop: safeAreaTop,
          width: SCREEN_WIDTH,
          height: fullHeight,
          opacity: visibility.target,
        }}
        resizeMode="cover"
        fadeDuration={0}
      />
      {/* ... */}
    </View>
  );
}

// ...
Animation transcript:
- The detail screen opens on top, transparent. Its full-res photo is mounted but hidden:
visibility.targetis0. - A spring drives
progressfrom0to1. The thumbnail’s translate, scale and height are interpolated from it, above every screen. - The animation ends on the low-res thumbnail. It’s blurry at full screen: nothing shows the full-res photo yet.
The thumbnail now flies from its cell to full screen. Here is where the animation ends:

This isn't the final result yet. The screen shows the 150 px thumbnail, stretched to the full width of the screen. The full-res photo is already loading on the detail screen, but it stays hidden. Step 6 swaps it in as soon as it loads.
Try tapping Close: nothing happens. The thumbnail still lives in the root host, above every screen, and it covers the button. We'll fix that in step 7. Until then, reload the app to get back to the grid.
The animated height style is always attached and returns THUMB_SIZE when the thumbnail isn't animating. Attaching an animated style only when the animation starts can produce one frame with zero height on Android, because the first Fabric commit happens before Reanimated provides the value.
Step 6: Hand off to the full-res photo
Now the most interesting part. The full-res photo starts loading as soon as the detail screen mounts, while the thumbnail is still flying. The moment it's ready, we want it on screen.
For that, the full-res <Image> follows the same interpolation as the thumbnail, at opacity: 0. Both images cover the same rectangle in every frame, so we can swap them at any moment. The swap itself is a single store update. Declare targetElementAvailable in the HeroStore interface and add it to the store:
interface HeroStore {
  // ...
  transitionCompleted: () => void;
  targetElementAvailable: () => void;
  // ...
}

export const useHeroTransition = create<HeroStore>((set, get) => ({
  // ...
  transitionCompleted: () => {
    set({ isAnimationCompleted: true });
  },

  targetElementAvailable: () => {
    // Swap visibility: hide source thumbnail, show target full-res image
    set({ visibility: { source: 0, target: 1 } });
  },

  // ...
}));
The thumbnail selects its opacity from visibility.source, next to the other selectors:
const goForward = useHeroTransition((s) => s.goForward);
const source = useHeroTransition((s) =>
  s.id === photo.id ? s.visibility.source : 1,
);
And applies it to the image:
<Animated.Image
  style={[{ width: THUMB_SIZE, opacity: source }, animatedHeight]}
  source={{ uri: photo.thumbnail }}
  resizeMode="cover"
/>
The detail screen animates the full-res photo along the same path and calls targetElementAvailable from onLoad:
import { useCallback } from "react";
import { Pressable, StyleSheet, Text, View } from "react-native";
import Animated, {
  interpolate,
  useAnimatedStyle,
} from "react-native-reanimated";
// ...
import { SCALE, SCREEN_WIDTH } from "./constants";
import { useHeroTransition } from "./hero";

type PhotoDetailProps = StaticScreenProps<{ photo: Photo }>;

function PhotoDetail({ route }: PhotoDetailProps) {
  const { photo } = route.params;
  const { targetElementAvailable, visibility } = useHeroTransition();
  const progress = useHeroTransition((s) => s.progress);
  const direction = useHeroTransition((s) => s.direction);
  const position = useHeroTransition((s) => s.position);
  // ...

  const onLoad = useCallback(() => {
    if (useHeroTransition.getState().id === photo.id) {
      targetElementAvailable();
    }
  }, [photo.id, targetElementAvailable]);

  // ...

  const heroImage = useAnimatedStyle(() => {
    if (direction === "neutral" || !position) {
      return {
        width: SCREEN_WIDTH,
        height: fullHeight,
        transform: [],
      };
    }
    return {
      width: SCREEN_WIDTH,
      height: interpolate(progress.value, [0, 1], [SCREEN_WIDTH, fullHeight]),
      transform: [
        { translateX: interpolate(progress.value, [0, 1], [position.x, 0]) },
        {
          translateY: interpolate(
            progress.value,
            [0, 1],
            [position.y - safeAreaTop, 0],
          ),
        },
        { scale: interpolate(progress.value, [0, 1], [1 / SCALE, 1]) },
      ],
    };
  }, [direction, position, safeAreaTop, fullHeight]);

  return (
    <View style={styles.container}>
      <Animated.View style={[styles.backdrop, backdrop]} />
      <Animated.Image
        source={{ uri: photo.fullSize }}
        style={[
          styles.heroImage,
          { marginTop: safeAreaTop, opacity: visibility.target },
          heroImage,
        ]}
        resizeMode="cover"
        fadeDuration={0}
        onLoad={onLoad}
      />
      {/* ... */}
    </View>
  );
}

const styles = StyleSheet.create({
  // ...
  heroImage: {
    transformOrigin: "0% 0%",
  },
  // ...
});

// ...
Animation transcript:
- The detail screen mounts the full-res photo, invisible. Its
<Image>sits atopacity: 0on the thumbnail’s path while it loads. - Both ride the same spring, but you only see the low-res one. One
progressvalue drives translate, scale and height on both layers. - When
onLoadfires mid-flight, one commit swaps them.set({ visibility: { source: 0, target: 1 } })hands the image over to the detail screen in the same native frame. - The full-res photo finishes the animation. The hidden thumbnail keeps pace until it ends.
Now the photo turns sharp the moment it loads: mid-flight if the network is fast, right after the animation if it's slow. Both changes of the swap land in the same commit, so there's never a frame with both images hidden or both visible.
The thumbnail lives in the root PortalHost and the full-res image lives in the detail screen, but both derive their position, scale and height from the same shared progress value. At any moment they are pixel-aligned, so hiding one and showing the other in a single commit is invisible to the user, at any point of the animation.
fadeDuration={0} turns off Android's default image fade-in, so the photo appears in a single frame when it's swapped in.
Step 7: Return the thumbnail to its cell
The thumbnail has done its job. Once the animation has finished and the full-res photo is shown, we send the thumbnail back to its cell:
import {
  type SharedValue,
  makeMutable,
  runOnJS,
  withSpring,
  withTiming,
} from "react-native-reanimated";
// ...

interface HeroStore {
  direction: "forward" | "backward" | "neutral";
  /** Which photo is currently animating (Portal teleport) */
  id: string;
  /** Photo that owns the hero pipeline; survives teleportBack so opacity gating works during detail + back */
  ownerId: string;
  // ...
  isAnimationCompleted: boolean;
  isTargetElementAvailable: boolean;
  // ...
}

export const useHeroTransition = create<HeroStore>((set, get) => ({
  direction: "neutral",
  id: "",
  ownerId: "",
  // ...
  isAnimationCompleted: false,
  isTargetElementAvailable: false,
  set: (newState) => set((state) => ({ ...state, ...newState })),

  transitionCompleted: () => {
    set({ isAnimationCompleted: true });

    if (get().isTargetElementAvailable) {
      get().targetElementAvailable();
    }
  },

  targetElementAvailable: () => {
    set({ isTargetElementAvailable: true });

    if (!get().isAnimationCompleted) {
      // Full-res image is ready mid-flight: it follows the same animation,
      // so swap it in now and teleport back once the animation completes
      set({ visibility: { source: 0, target: 1 } });
      return;
    }

    const teleportBack = () => {
      // Wait several frames then reset — detach animated style
      // and return thumbnail to normal grid rendering
      setTimeout(() => {
        set({
          id: "",
        });
        get().progress.set(1);
      }, 48);
    };

    // Swap visibility: hide source thumbnail, show target full-res image
    set({
      direction: "neutral",
      visibility: { source: 0, target: 1 },
      isTargetElementAvailable: false,
      isAnimationCompleted: false,
    });

    // Animate progress back to 0 (instantly) to return thumbnail to grid position,
    // then detach from portal host
    setTimeout(() => {
      get().progress.set(
        withTiming(0, { duration: 0 }, () => {
          runOnJS(teleportBack)();
        }),
      );
    }, 16);
  },

  goBack: (callback: () => void) => {
    get().progress.set(0);
    set({
      direction: "neutral",
      id: "",
      ownerId: "",
      position: undefined,
      visibility: { source: 1, target: 0 },
      isAnimationCompleted: false,
      isTargetElementAvailable: false,
    });
    callback();
  },
  goForward: (id: string, x: number, y: number, callback: () => void) => {
    set({
      direction: "forward",
      position: { x, y },
      visibility: { source: 1, target: 0 },
      isAnimationCompleted: false,
      isTargetElementAvailable: false,
      id,
      ownerId: id,
    });
    // ...
  },
}));
The animation and the photo can finish in either order:
- Photo loads first (during the animation):
targetElementAvailableswapsvisibilityimmediately and returns. When the spring finishes,transitionCompletedsees that the photo is available and finishes the handoff. - Animation finishes first:
transitionCompletedonly records that fact. When the photo loads later,targetElementAvailableswapsvisibilityand finishes the handoff right away.
Finishing the handoff means resetting progress to 0 for the hidden thumbnail and clearing id, which teleports the thumbnail back into its cell. Then progress goes back to 1 for the detail screen.
Back in its cell, the thumbnail must stay hidden while the photo is open, otherwise it would flash behind the viewer. ownerId remembers which photo is open after id has been cleared:
const source = useHeroTransition((s) =>
  s.id === photo.id || s.ownerId === photo.id ? s.visibility.source : 1,
);
Animation transcript:
- When the animation ends, the thumbnail teleports back to its cell. It stays hidden while the photo is open, and Close fades in.
opacity: 0 hides a view, but it still receives touches. A hidden thumbnail left in the root host would sit above every screen and swallow taps meant for the detail screen. Returning the thumbnail frees the root host for the next transition too.
Close works again. It closes instantly for now; let's animate it.
Step 8: Animate the way back
The way back doesn't need a teleport at all. The full-res photo is already on the detail screen, and it uses the same interpolation as on the way in. So closing is just progress going back to 0: the photo shrinks into the cell where its thumbnail is waiting, hidden. When the spring finishes, the store shows the thumbnail again and navigation.goBack() removes the detail screen:
export const useHeroTransition = create<HeroStore>((set, get) => ({
  // ...
  goBack: (callback: () => void) => {
    set({ direction: "backward" });

    const onAnimationFinished = () => {
      set({
        direction: "neutral",
        id: "",
        ownerId: "",
        position: undefined,
        visibility: { source: 1, target: 0 },
        isAnimationCompleted: false,
        isTargetElementAvailable: false,
      });
      callback();
    };

    get().progress.set(
      withSpring(0, SPRING_CONFIG, () => {
        runOnJS(onAnimationFinished)();
      }),
    );
  },
  // ...
}));
The detail screen shows the Close button only when the opening animation has finished, and the Android back button runs the same animation:
import { useCallback, useEffect } from "react";
import { BackHandler, Pressable, StyleSheet, Text, View } from "react-native";
import Animated, {
  interpolate,
  useAnimatedStyle,
  useSharedValue,
  withTiming,
} from "react-native-reanimated";
// ...
import { useHeroTransition } from "./hero";

const AnimatedPressable = Animated.createAnimatedComponent(Pressable);

type PhotoDetailProps = StaticScreenProps<{ photo: Photo }>;

function PhotoDetail({ route }: PhotoDetailProps) {
  // ...

  const isTransitionDone = visibility.target === 1 && direction !== "forward";
  const buttonOpacity = useSharedValue(0);

  // ...

  const onGoBack = useCallback(() => {
    goBack(navigation.goBack);

    return true;
  }, [navigation, goBack]);

  useEffect(() => {
    buttonOpacity.value = withTiming(isTransitionDone ? 1 : 0, {
      duration: 200,
    });
  }, [isTransitionDone, buttonOpacity]);

  useEffect(() => {
    const listener = BackHandler.addEventListener(
      "hardwareBackPress",
      onGoBack,
    );
    return () => listener.remove();
  }, [onGoBack]);

  const buttonStyle = useAnimatedStyle(() => ({
    opacity: buttonOpacity.value,
  }));
  // ...

  return (
    <View style={styles.container}>
      {/* ... */}
      <AnimatedPressable
        style={[styles.backButton, { top: safeAreaTop + 10 }, buttonStyle]}
        onPress={onGoBack}
        disabled={!isTransitionDone}
      >
        <Text style={styles.backText}>Close</Text>
      </AnimatedPressable>
    </View>
  );
}

// ...
Animation transcript:
- Close runs the same interpolation in reverse.
goBackspringsprogressback to0, and the full-res photo shrinks into the cell on the detail screen. - Then the thumbnail shows up and the detail screen closes.
visibilitygoes back to{ source: 1, target: 0 }, andnavigation.goBack()removes the screen.
Closing earlier would interrupt the spring whose completion callback finishes the handoff. Hiding and disabling the button until then keeps the two animations from overlapping.
That's the whole transition. Run the app, tap a photo, and you should see the result from the video at the top of this page.
The full pipeline
Here are all the steps together: teleport, animation, handoff, return and the way back. Use the timeline to inspect any moment, and watch the store values below it change.
Animation transcript:
- The gallery: a
FlatListof low-res thumbnails. APortalHostnamed"root"waits above the navigator. - Every thumbnail is wrapped in a
<Portal>. Without a host name, it renders in place, inside theFlatList. - Tap teleports the thumbnail into the root
PortalHost.<Portal hostName="root">re-parents the same native view, in one frame. - The detail screen mounts the full-res photo, invisible. Its
<Image>sits atopacity: 0on the thumbnail’s path while it loads. - Both ride the same spring, but you only see the low-res one. One
progressvalue drives translate, scale and height on both layers. - When
onLoadfires mid-flight, one commit swaps them.set({ visibility: { source: 0, target: 1 } })hands the image over to the detail screen in the same native frame. - The full-res photo finishes the animation. The hidden thumbnail keeps pace until it ends.
- When the animation ends, the thumbnail teleports back to its cell. It stays hidden while the photo is open, and Close fades in.
- Close runs the same interpolation in reverse.
goBackspringsprogressback to0, and the full-res photo shrinks into the cell on the detail screen. - Then the thumbnail shows up and the detail screen closes.
visibilitygoes back to{ source: 1, target: 0 }, andnavigation.goBack()removes the screen. - What users see: one continuous image, sharp as soon as it’s ready. No flicker, no blank frames, no second decode of the full-res photo.
The complete code of this guide is part of the example app. The only differences are the imports that wire the screens into the example's navigation.
Why build a custom transition?
Ready-made viewers
Ready-made image viewers such as Galeria give you a polished native viewer with one component: pinch to zoom, swipe to dismiss and paging between images work out of the box, and it supports images and videos. If that's all your app needs, it's a great choice.
The trade-off is control over the viewer UI: it's a native view controller with a few appearance options, and your own React Native views can't be rendered inside it.
With react-native-teleport, the full-screen viewer is a regular React Native screen, so it can contain anything your design needs: a custom header, captions, comments, action buttons or a tab bar.
| Ready-made viewer (Galeria) | Custom transition (this guide) | |
|---|---|---|
| Viewer UI | 🟠 Native, with a few appearance options | ✅ Any React Native UI: header, captions, actions, tab bar |
| Transition | ✅ Built in | ✅ Yours to shape: path, spring and timing are written with Reanimated |
| Progressive loading | 🟠 Two stages: the thumbnail and one image for the expanded state | ✅ As many stages as you need, such as low → medium → high-res → HDR, each swapped in as soon as it loads, even mid-flight |
| Content in the viewer | 🟠 Images and videos | ✅ Any React Native view: images, videos, GIFs, Lottie, keeping their state |
| Zoom, paging, swipe away | ✅ Built in | 🟠 Add them with react-native-gesture-handler and Reanimated |
| Setup | ✅ One component | 🟠 The nine files in this guide |
Native transitions move views too
Moving a view into a layer above every screen isn't a trick invented for React Native. Native transition APIs do the same thing and hide it behind a higher-level API:
- Android. Activity shared element transitions draw the shared views in an overlay instead of the normal view hierarchy, and that's the default (
Window.setSharedElementsUseOverlay). In Jetpack Compose, a shared element is elevated into an overlay when the transition starts and dropped back into its ownDrawScopewhen it ends. - iOS. A custom view controller transition runs in the transition context's
containerView, which acts as the superview of every view involved in the animation. Since iOS 18, the zoom transition wraps this into a single API: you return the source view, and UIKit animates the rest.
These APIs work well when you need exactly the transition they provide. As soon as you need something they don't expose, such as your own header over the photo, a mid-flight swap from a low-res to a full-res image or the same behavior on both platforms, you're back to the low-level building blocks, written twice, in Kotlin and in Swift.
react-native-teleport takes the same route as react-native-gesture-handler, react-native-reanimated and react-native-screens. Each of them exposes a low-level native capability to JavaScript (native gesture recognizers, animations on the UI thread, native navigation containers), and you build the high-level behavior on top of it once, for every platform. Here, that capability is moving a native view to another parent.
Comparing approaches
There are several ways to animate an item from a list to full screen. They differ in what happens to the item's content while it moves:
| Animate in place | Render a copy | Animate a snapshot | Teleport (this guide) | |
|---|---|---|---|---|
| How it works | Scale the cell with transform and zIndex inside the list | Mount a second instance in an overlay or on the next screen | Capture a bitmap of the view and animate the bitmap | Move the native view into the root PortalHost |
| Heavy content rendered once | ✅ | ❌ Twice, two instances in memory | 🟠 Once, plus a bitmap of it1 | ✅ |
| Videos, GIFs and Lottie keep playing | ✅ | ❌ The copy starts over | ❌ Frozen for the whole animation | ✅ It's the same native view |
| Not clipped by the list | ❌ | ✅ | ✅ | ✅ |
| Drawn above headers and tab bars | ❌ | ✅ | ✅ | ✅ |
| Works in React Native | ✅ | ✅ | ✅ | ✅ On iOS, Android and web |
1 The snapshot is a bitmap of the view's pixels. It stays in memory next to the view itself until the animation ends, so the content is rendered once but held twice.
Teleport adds no heavy allocations to the transition:
- The thumbnail is moved, not copied.
<Portal>re-parents the existing native view, so nothing is re-mounted, re-downloaded or re-decoded. - The full-res photo is decoded once, on the detail screen, when the user opens it. It's a separate image, not a copy of the thumbnail, and it needs no prefetching or caching.
- The list holds only small thumbnails, so it stays fast and light however long it gets.
A copy of a full-res photo is the most expensive thing a transition can add: a 48 MP iPhone photo takes about 195 MB of memory once decoded (8064 × 6048 × 4 bytes), and its ProRAW file alone is about 75 MB.
Compared with the Instagram-like transitions
If you've read the Instagram-like transitions recipe, most of these building blocks were already familiar: a root PortalHost, a Zustand store with a shared progress value, measureInWindow and a transparent modal. Two ideas are new here:
- The thumbnail goes back. In the Instagram recipe, the video travels from the feed into the Reels screen and stays there until you go back. Here the thumbnail only carries the animation: once the full-res photo has taken over, the thumbnail returns to its cell, and the detail screen owns the photo.
- Two sources in one transition. The Instagram recipe moves one video from start to finish. Here a cheap low-res thumbnail starts the animation instantly, and the full-res photo replaces it the moment it loads, even mid-flight.
The handoff works between any two views that cover the same rectangle, so the detail screen could, for example, swap in an HDR version of the photo while the list keeps lightweight SDR thumbnails.
Extend it further
<Portal> doesn't render a copy of the thumbnail: it moves the existing native view between parents. Whatever runs inside that view keeps running during the transition:
- a video keeps playing while it grows to full screen, with no restart and no black frame;
- a GIF or Lottie animation continues from the same frame;
- any other native state, such as a scroll position or a WebView, is preserved.
For media that loads progressively, apply the same handoff as in this guide: show the cheap version (a poster image or a low-bitrate stream) inside the portal, render the expensive version on the detail screen along the same path, and swap them when the expensive one reports that it's ready, for example onLoad for images or onReadyForDisplay for react-native-video. The Instagram-like transitions recipe shows a video teleported between a feed and a full-screen viewer while it keeps playing.
Where to use this pattern
- Chat apps. Tapping an image or video attachment in a message bubble opens it full screen from the bubble's exact position, and closing returns it to the bubble.
- Social feeds. Posts with several images (as on Facebook, X or in Instagram carousels) can open any image from its tile. Use an id that is unique per attachment, such as
postIdplus the image index, so only the tapped tile teleports. - Photo galleries and e-commerce. Product images, albums and media pickers share the same thumbnail-to-full-screen flow.
In every case the list keeps rendering lightweight thumbnails, and the expensive media is loaded only for the item the user opens.
Things to keep in mind
📸 Loading the full-res photo
The full-res photo is downloaded and rendered once, by the detail screen. The thumbnail that flies across the screen is the original grid view, moved by <Portal>, so the transition needs no custom cache or prefetching. When the swap happens depends on the network:
- Cached photo.
onLoadfires almost immediately, and the swap happens at the very start of the animation. - Slow network. The low-res thumbnail stays in its final position until
onLoadfires, then the same single-commit swap shows the photo.
Any image component works the same way, as long as it reports when the image is ready (an onLoad-style callback) and supports cover cropping.
The thumbnail and the full-res image must have the same aspect ratio and the same resizeMode, otherwise they crop different parts of the photo and the content jumps at the swap. On Android, also set fadeDuration={0} on the full-res <Image>, so it swaps instead of fading in.
🎬 Starting the animation on Android
- Blank frame when the animation starts. Keep animated styles attached for the component's whole lifetime instead of adding them when the animation begins.
- Wrong start position. With edge-to-edge enabled,
measureInWindowcan be offset by the status bar height.useMeasurecompensates for it.
🔁 After the handoff
A hidden view in the root host still receives touches. Left there, the thumbnail swallows taps meant for the detail screen, so return it to its cell once the full-res photo is shown.
While the viewer is open, keep the returned thumbnail hidden, or it flashes in the grid behind the viewer. In this guide ownerId keeps visibility.source applied to the thumbnail after it has been teleported back.
📱 Supported platforms
react-native-teleport supports iOS, Android and web. This transition was verified frame by frame on iOS and Android with the New Architecture.